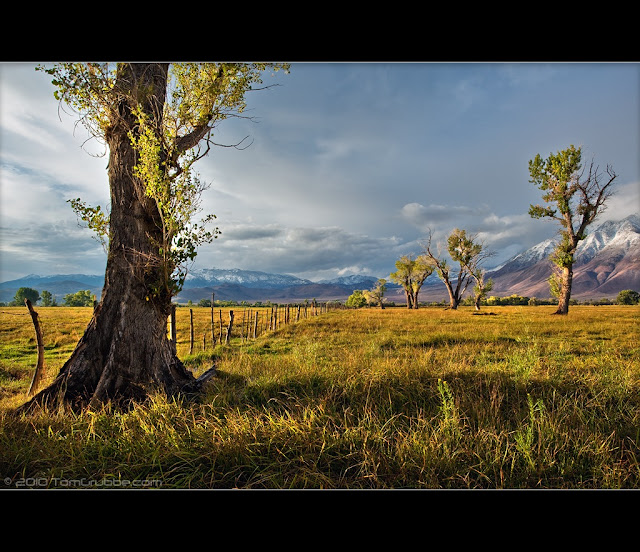
Today I'll give you a bunch of tips that should allow beginners to greatly improve on their lanscape photography. From there, you should be able to experiment and grow you own skills. I'll cover:
- Some very basic framing tips (I'll leave advance composition up to you, that's where the fun is)
- How to set up your camera properly to limit the need for editing afterwards
- How to edit, because a digital camera is collecting information, it need editing, the digital equivalent of development
I'll use the photos of Tom Grubbe, because he is totally amazing at it, and I suck (I'm a portrait photographer)
 |
| Your goal. From amazing landscape photographer Tom Grubbe. |
Framing
Proper framing should draw attention to the subject, put it in context, a create a sensation of "dimension" (call is distance, or multiple plans). An other key element of framing is that the brain extrapolates, sees directions, guesses what's cropped. It's often easy even for an amateur to say "it's poorly framed", or "it's great", but it's harder to actually explain why.
- Use the rule of third. A picture can be composed in third, as in the following example. Elements, horizon line , you don't need to have anything split in thirds, but some key parts should, to give proper balance.
 |
| Courtesy of dpexperience.com |
- Use elements that are in different plans to create depth. Front elements should be either on the side, or surrounding the center, of in front but of centered to the left or right, not in the middle. You can then have a middle element that can occupy an other third.
 |
| Tom Grubbe. |
- Use geometric shapes at your advantage: highlight a escape route, use diagonal lines to lead the eye.
 |
| Tom Grubbe again: see of the tree on the left follow by the fence fadding away are perfect examples of the 2 previous points. |
 |
| Using shapes and geometry (and arrows) to lead to a escape point. This one's by me. |
Set up your camera properly
The big issue for landscape is exposure: it's very unlikely that every element in the shot is receiving or emitting the same amount of light. You already know what I'm talking about: ground element look ok but sky is plain white? Snowy mountains not showing well because they are too bright compared to the rest?Rings a bell? You bet it does.
What's supposed to help you solve that is proper metering of light, therefore exposure, and dynamic range. The first one is simple: how well did you measure the average amount of light (this way everything is pretty much being exposed properly), the second one is how much you camera can capture huge light variations around that middle point. The higher the dynamic range, the more you camera can capture both dark and bright zones properly. HDR? It means hight dynamic range, it consist it faking better dynamic range by merge 2 or more images. It was essentially invented to compensate a weakness of digital cameras over film: film has fantastic dynamic range.
- Metering: set your camera to matrix metering, this way it will measure light across the entire frame and average it properly.
 |
| matrix metering mode is this one, looks the same on every camera. |
- Dynamic range: if you have a modern camera, use the dynamic range functionality. If you don't, you can use filters. You can screw them in front of your lens, and the top part will be filtering light, so that your skies come out blue and detailed, instead of plain white.
- Aperture
Finally, how do you make sure your entire landscape is sharp, both foreground and background? In order to do so, you must shoot with very low aperture (the f.number thingy on your lens). Prefer f8 and above. It reduced the amount of light going thru the lens, so you need to have a slower shutter speed, which lead to more of the image being sharp. The opposite works for portraits.
That leads us to the one accessory you MUST have for landscape: a tripod. Even a super small cheap one, just anything that allow having a camera steady. Why? because if you open at f11, f16, you'll need a bright sunny day to shoot handheld. Anything other light condition, and the slow shutter speed will make your image blurry. Use a pod.
Use the maximum resolution your camera has to offer, don't for 5MP to save memory card. Get a bigger card ! You didn't spend 500$ on that camera to use it at it's lowest resolution to save 20$ of memory card! (I witnessed that too many times)
Editing your pictures
No, using photoshop is no taboo. Not using photoshop doesn't make you a snob cool artist who's so good he doesn't need it. A digital image need processing, 99.9999% of the time. Why? Because it's your image, you can't let the camera decise for you, otherwise you're just a button pusher.
What is editing for then? How many time did you find your landscape pictures were flat? Colorless? Misshaped? Ah ah, now I got your attention.
- Correcting distortion
landscape = wide angle lens = distortion. Luckily most editing software have lens profiles in them.They can recognize the lens and offer the right presets for distortion correction. Use it, it's great.
 |
| See how the Berlin wall (bottom ) is straight? on the original shot it was curving to the point that the shot was unusable. |
- Use the histograms or levels function to adjust the dark and bright zones
This will allow you adjust dynamic range, and give more texture to your image, make it less flat.
- Correct saturation
Playing with contrast impacts saturation. The more contrast you add, the more saturated your images, to the point that they look like a clown.


No comments:
Post a Comment